Stepping out of Ragunna City, I had no idea what awaited me in the moonlit groves of Rinascita. The whispers of a forgotten legend, the Silver Moon and the Crimson Moon, had pulled me into one of Wuthering Waves’ most enchanting secret quests. It felt less like a checklist of objectives and more like a knightly ballad unfolding in real time. My goal was clear: find the five elusive Silver Moon Knights, claim their swords, and summon the fabled Knight of Crimson Moon at Silver Moon Grove. But, truly, how often does a game ask you to piece together a story through duels, riddles, and remnants of tragic chivalry?
Before diving into the hunt, I took a moment to appreciate the sheer narrative weight of this quest. These knights are not just glorified loot piñatas; each one embodies a vice or virtue, and their scattered locations across Rinascita tell a silent story of a fallen order. My journey took me from sun-scorched ridge to misty grove, and I’ll walk you through every step, sword by sword, exactly as I experienced it.
The Knight of Atrocity: A Violent Welcome
My first encounter set the tone immediately. Leaving the Abyss of Initiation near Whinperwind Heaven, I spotted the Knight of Atrocity on the path just outside the city. Before I could even announce myself, a cutscene played—this knight was already in the middle of dispatching a group of Fractsidus members with cold efficiency. The moment their gaze locked onto me, I knew a duel was inevitable. No dialogue, no negotiation. Just a brutal clash of blades.
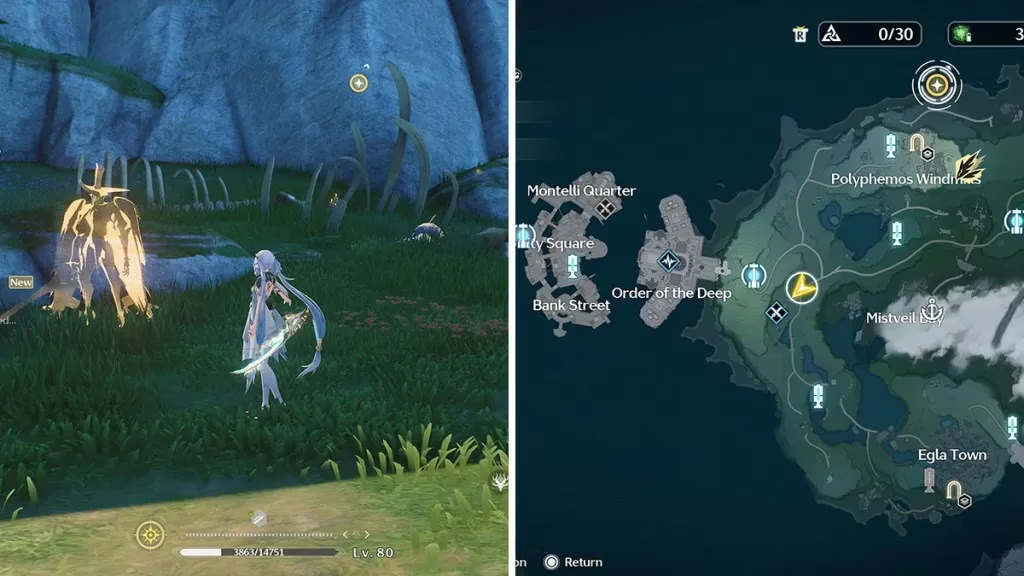
Defeating the Knight of Atrocity awarded me the Sword of Atrocity. The fight itself wasn’t overly complex—a few heavy slams and an aggressive charge—but the atmosphere of that roadside battle felt like a rite of passage. I remember thinking, is this what the rest of the quest holds? Spoiler: it gets far more interesting.
The Knight of Greed: Treasure and Treachery
From there, I turned south toward a Fractsidus encampment located between Polyphomos Wildmills and Lagunna City. The map led me to a guarded road, and the scenario was immediately different. No knight in sight, just a cluster of enemies protecting a tantalizing Advanced Supply Chest. I had to clear the camp first; only then did the chest unlock, and opening it triggered the boss fight with the Knight of Greed. It was a clever bait—greed lured me in, and greed summoned the knight.
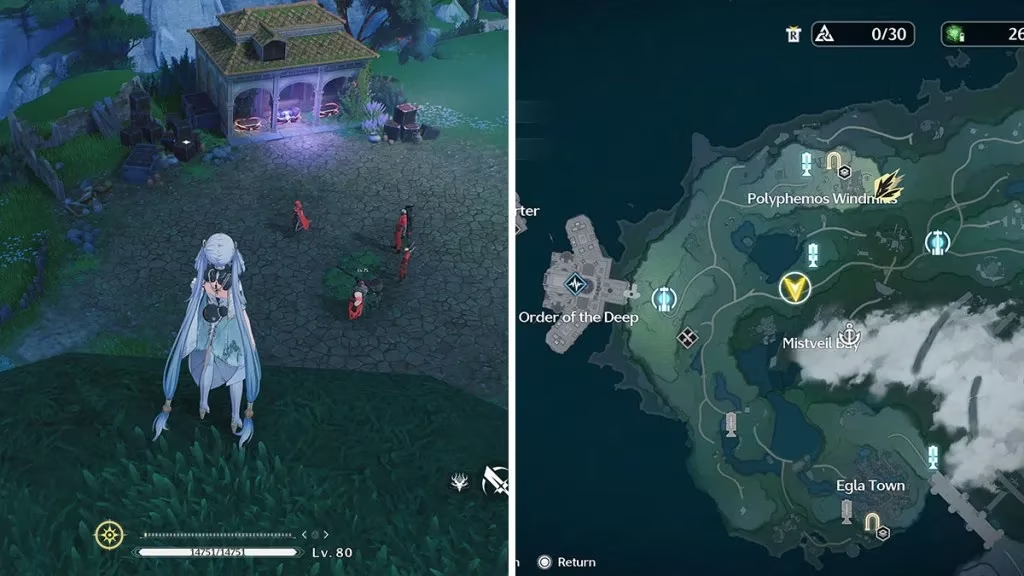
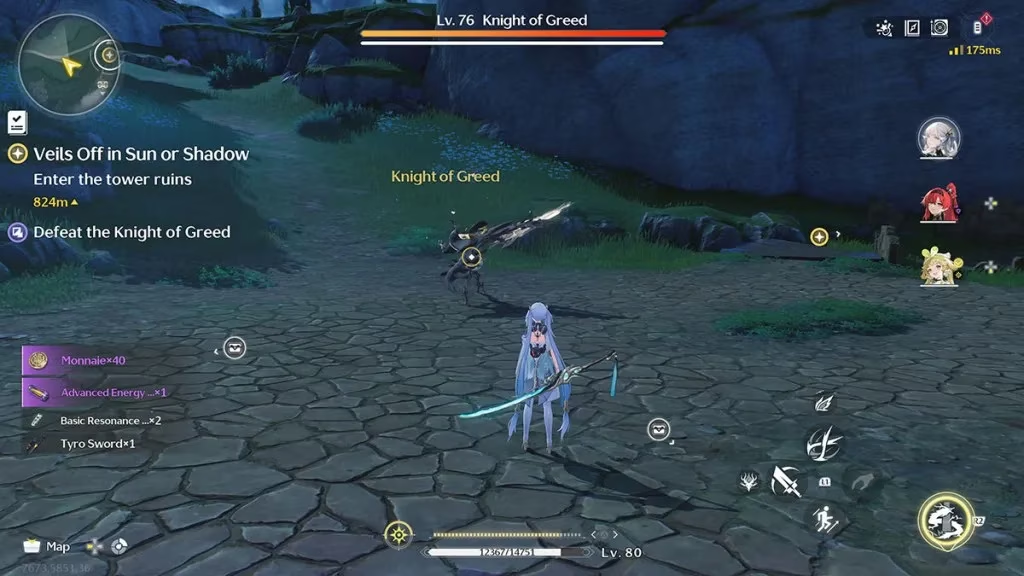
This battle tested my patience more than my skill—the Knight of Greed had a tendency to turtle up behind shield bashes. Yet, once I broke through, the Sword of Greed was mine. It struck me then how the quest design mirrors each knight’s namesake. Have you ever seen a game so committed to thematic gameplay?
The Knight of Cowardice: Mercy in the Bushes
After the intensity of the first two fights, the Knight of Cowardice was a refreshing change of pace. Heading south from the Atrocity battle site toward the waypoint connecting Ragunna City and Egla Town, I found this knight literally hiding in the undergrowth. I almost missed them—a crouched, trembling figure peering out from the bushes. Talking to them revealed a surprisingly tender moment: the knight willingly offered information about their sword, but only if I defeated the enemies guarding it. No betrayal, no sudden fight; just a weary soul looking for help.
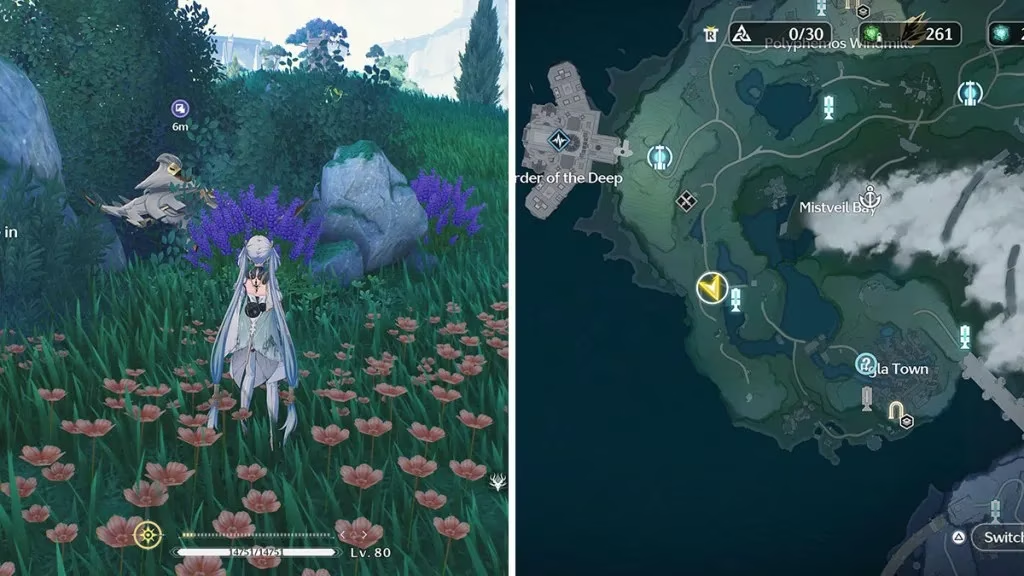
After clearing the small group of hostiles, I claimed the Sword of Cowardice. The whole encounter made me pause. Why were these knights reduced to such states? The quest seeds lore through these vignettes, and I was drinking it all in.
The Knight of Vanity: A Duel of Equals
If you ask me which encounter felt the most cinematic, it’s the Knight of Vanity. I found them at the gate connecting Egla Town to the Thessaleo Fields, the southern edge of Whinperwind Heaven. The knight was locked in a dramatic duel with a Diurnus Knight, and the gate’s ancient stonework framed the scene like a painting. To earn the Sword of Vanity, I had to defeat both combatants—the knight wouldn’t stop for me, and the Diurnus Knight saw me as an interloper. It quickly turned into a frantic two-on-one.
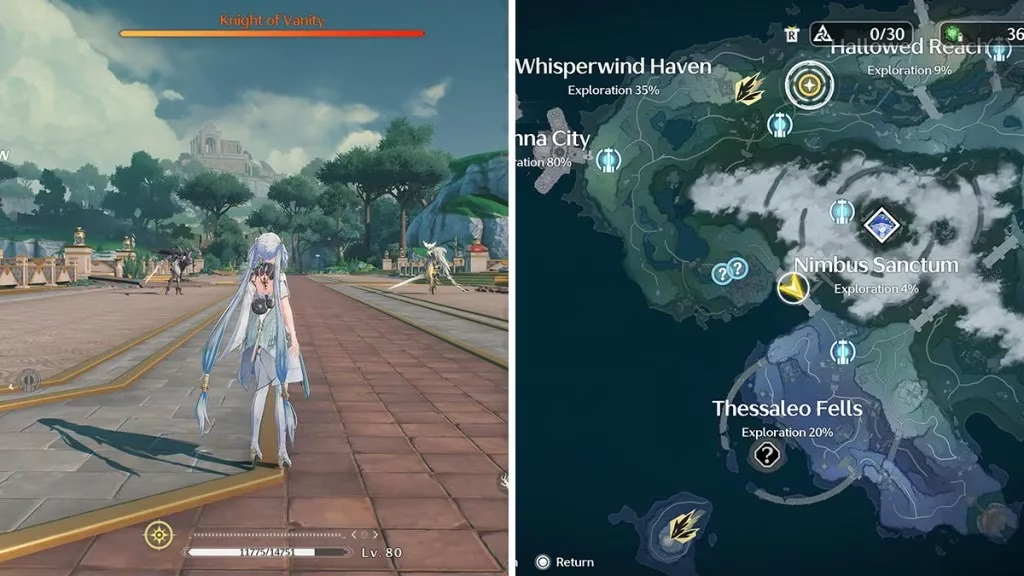
Winning that fight felt like crashing a private dance. The Knight of Vanity moved with a grace the others lacked, their attacks flowing like a performance. I’d be lying if I said I didn’t retry the battle just to watch the choreography again. Is it still vanity if you admire your enemy’s style?
The Knight of Ignorance: A Waiting Shadow
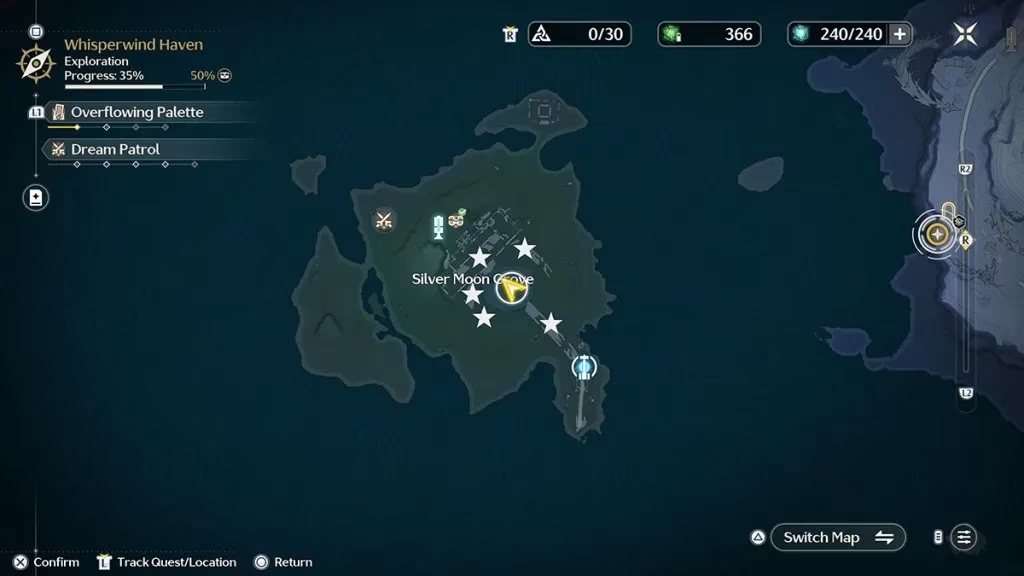
The final Silver Moon Knight brought me, at last, to Silver Moon Grove. Located north of Whinperwind Heaven, the grove is accessible by flying from the vantage points in Penitent’s End—a flight filled with anticipation. I found the Knight of Ignorance south of the Resonance Nexus, standing eerily still. No cutscene, no ambush. I had to initiate the fight myself, as if the knight existed in a state of oblivious limbo. It was unsettling and, frankly, brilliant.
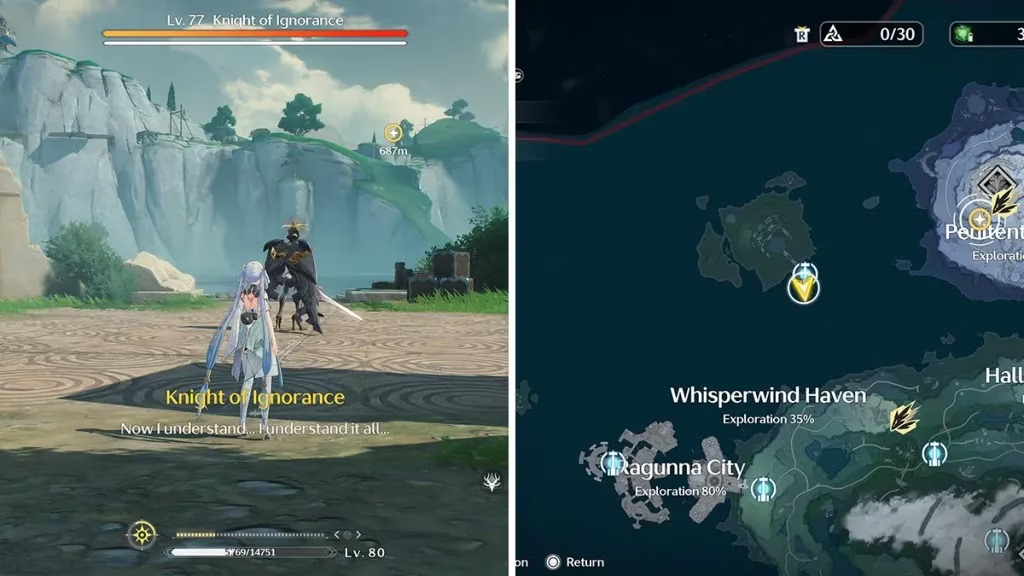
Defeating them granted the final sword. With all five in my possession, I felt the weight of the legend pressing on me. What comes next, after all, is the real reason we’re here.
Summoning the Crimson Moon Knight
Standing by the central pond of Silver Moon Grove, I found the five pedestals scattered around the water. Placing each sword felt ritualistic. Once the last blade clicked into place, a new, ominous sword rose from the center of the pond. Inspecting it prompted me to meditate and shift the time to 17:00. That’s when the Knight of Crimson Moon emerged, bathed in twilight.
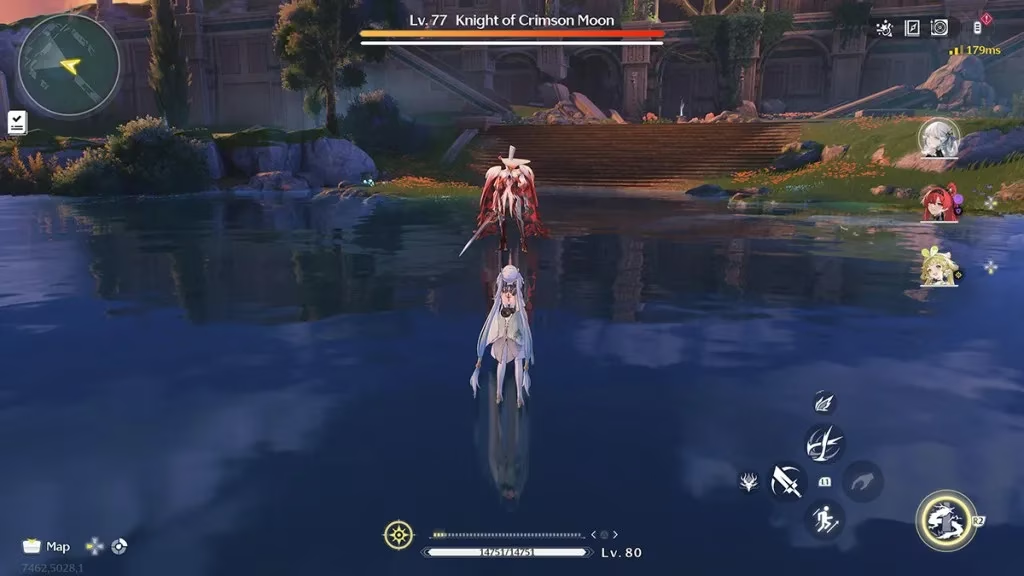
The boss fight wasn’t overly difficult—the knight’s moveset echoed the styles of the lesser knights, but with fiery crimson flourishes. I recommend bringing your best DPS and staying mobile. Once I conquered the knight, the quest concluded with a cascade of rewards: the Crimson Twilight Secret Trophy, 20 Astrite, one Lustrous Tide, and a pair of Basic Supply Chests and one Precious Supply Chest. The basic chests alone handed me 40 Monnaie, a welcome bonus.
This whole journey reminded me why secret quests feel special. They demand curiosity, observation, and a willingness to roam. Rinascita’s moonlit knights may be TD remnants now, but their story lives on through players who take the time to uncover it. And honestly, wasn’t that final sunset duel worth every sword swing?
As I look back on my journey, I can't help but think about the fine balance between preparation and spontaneity in such adventures. Whether it's strategizing for a game or planning a real-world quest, having the right tools can make a significant difference. Speaking of tools, if you're someone who enjoys keeping track of the best deals around gaming or other interests, you might find this price tracking tool incredibly useful. It allows you to stay updated on the latest discounts and offers, ensuring you're always ready for your next big purchase without overspending.
In the same way that gathering the Silver Moon swords was crucial for summoning the Crimson Moon Knight, having the right resources at your disposal can enhance any experience. The thrill of discovery and the satisfaction of unlocking hidden potential are what make both gaming and life adventures truly memorable. As you seek out new challenges, whether in the virtual realm or in reality, consider how well-equipped you are for what lies ahead, and explore tools that can aid in your quest for excellence.